Create a container
A container is a self-contained, runnable software application. Containers do not hold any persistent data and therefore can be destroyed and recreated as needed. They are created from templates called container images.
Creating a container is the first step to running any containerized application in your environment.
How to create a container
Follow these steps to create a container using VisualDock Server Manager:
-
Open VisualDock Server Manager.
-
Click Action → New Container… to launch the wizard.
-
On the Image page, select the container image to use:
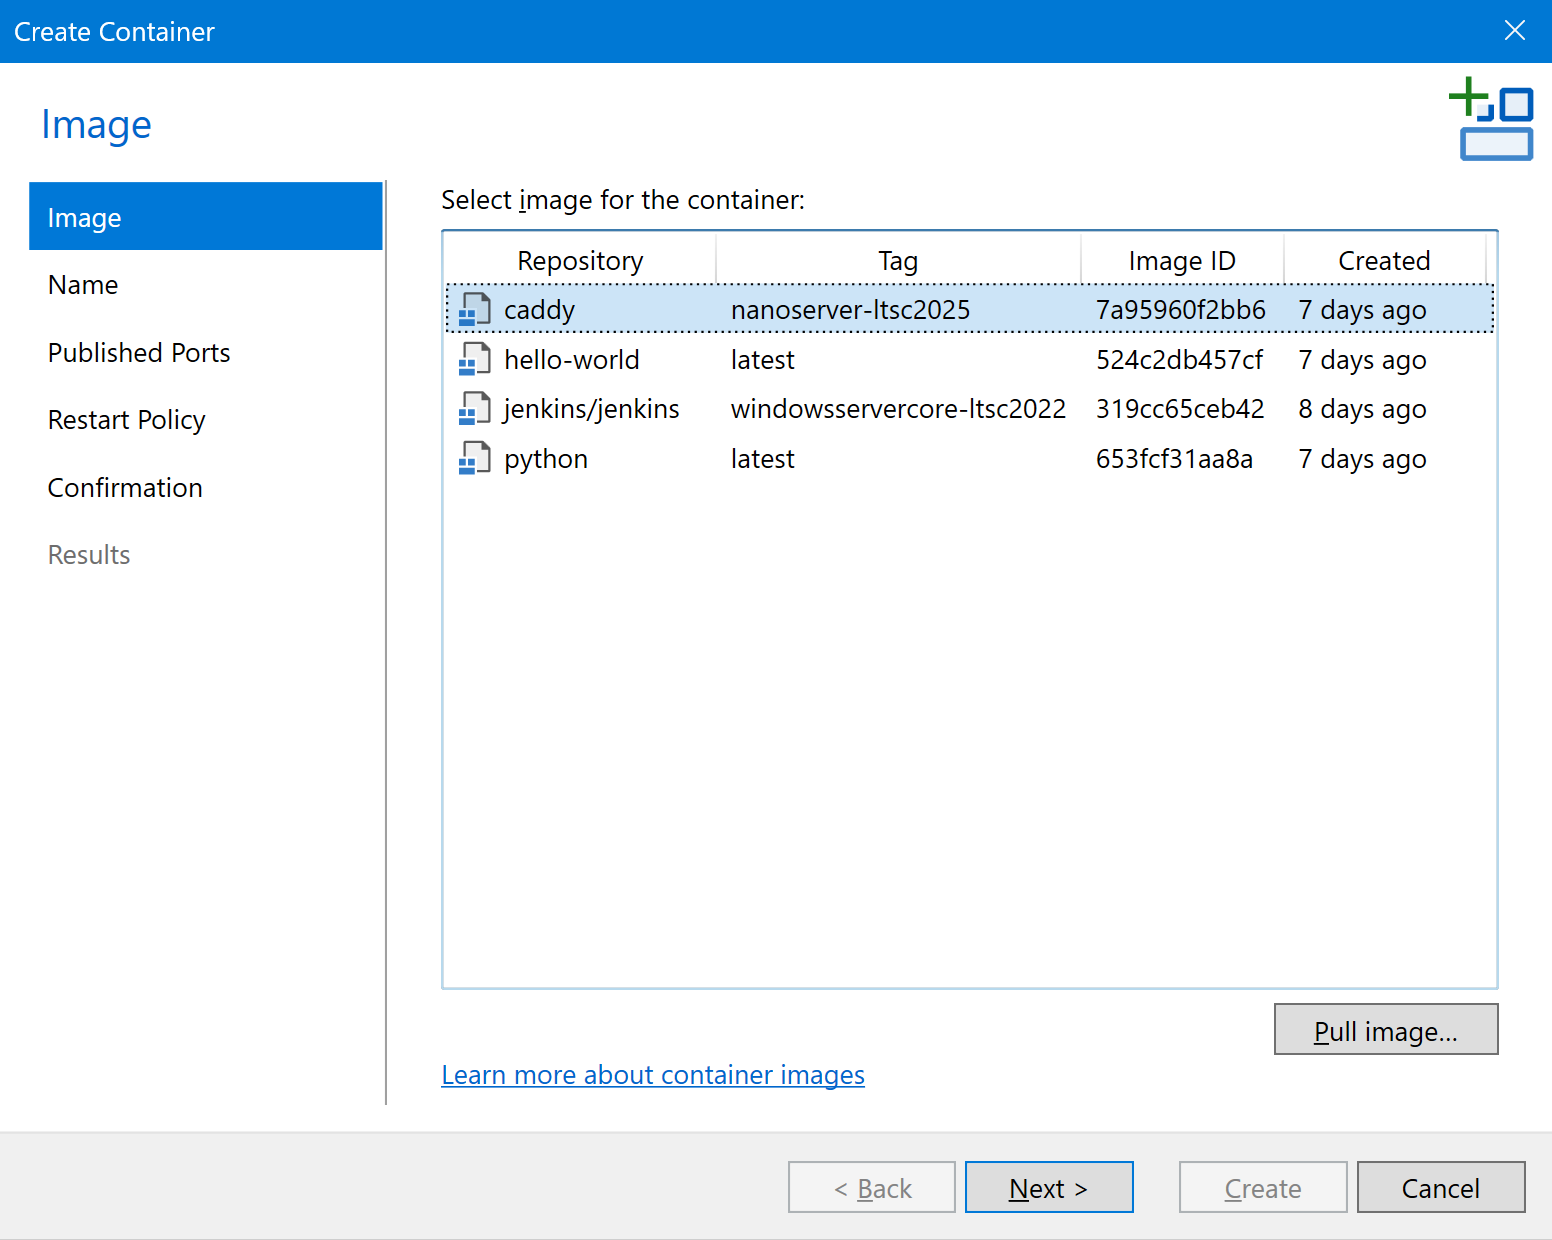
If there are no images in the list, click Pull image… to pull a new image from a container registry. Then, select the pulled image.
-
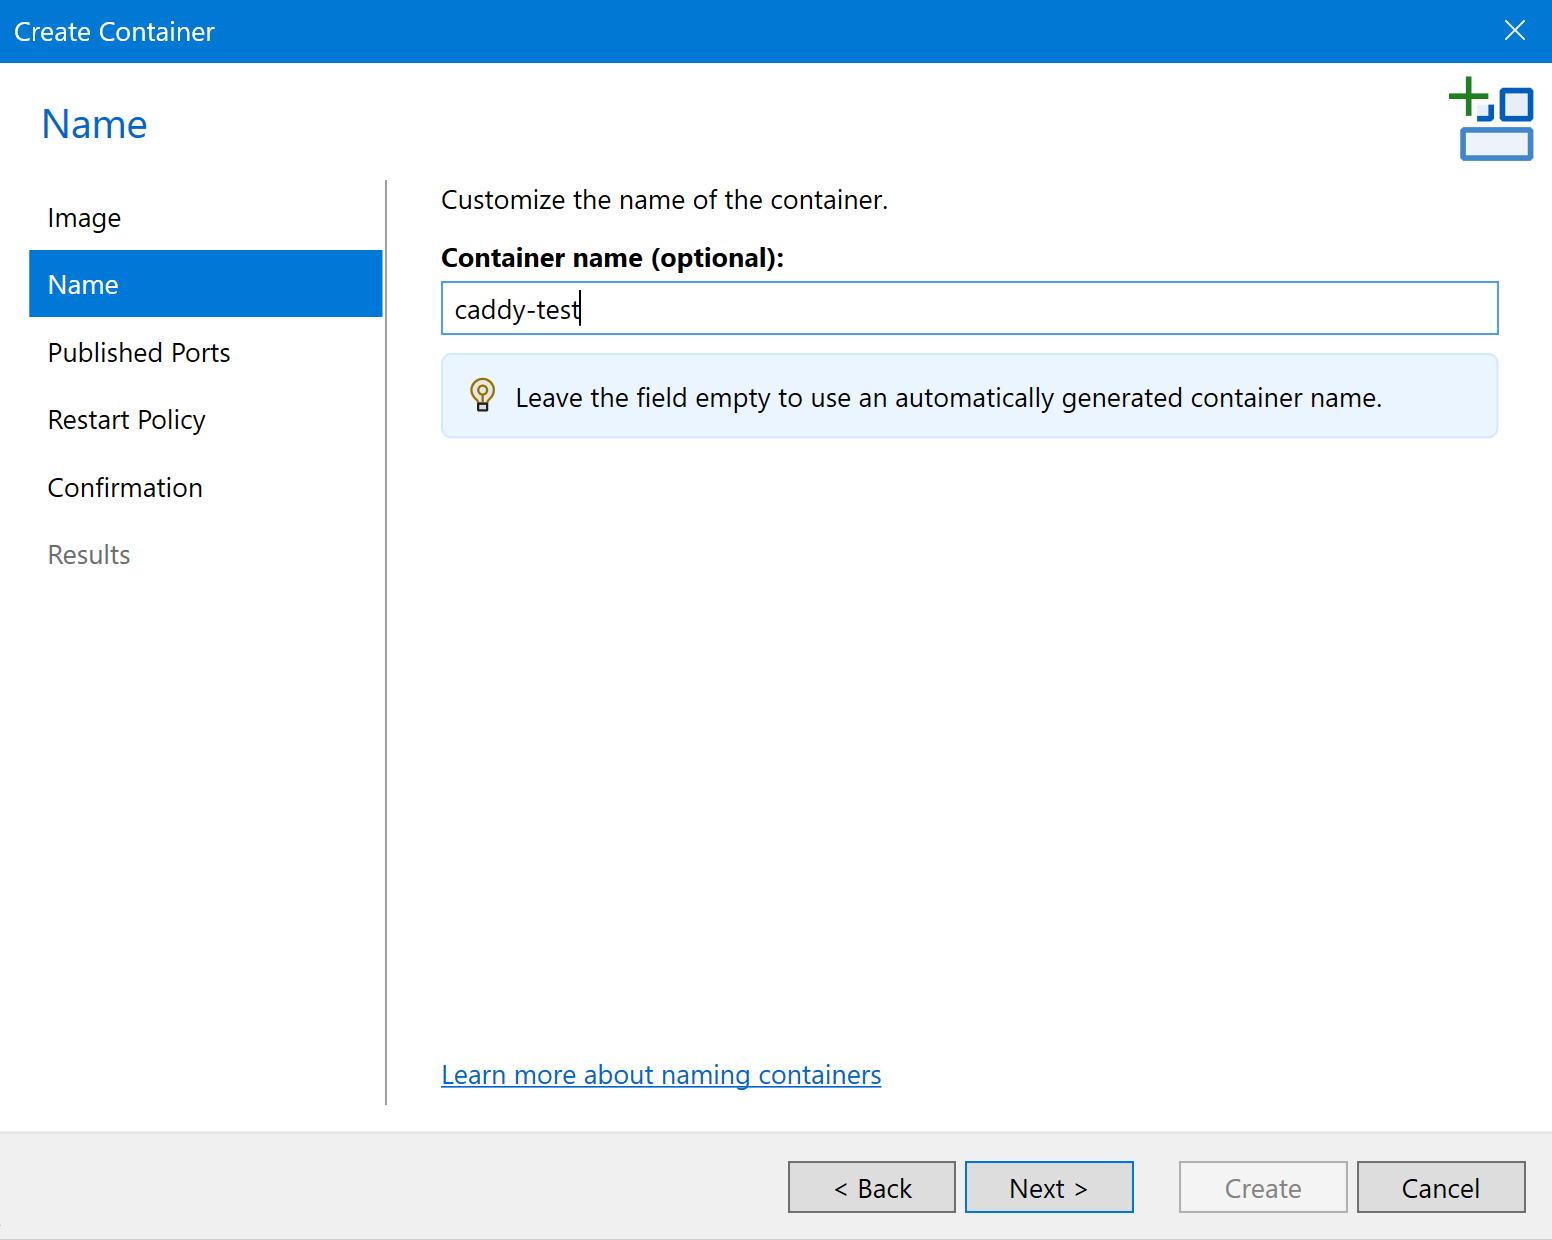
On the Name page, you can provide a name for the container, or leave the field empty to use an automatically generated name:
-
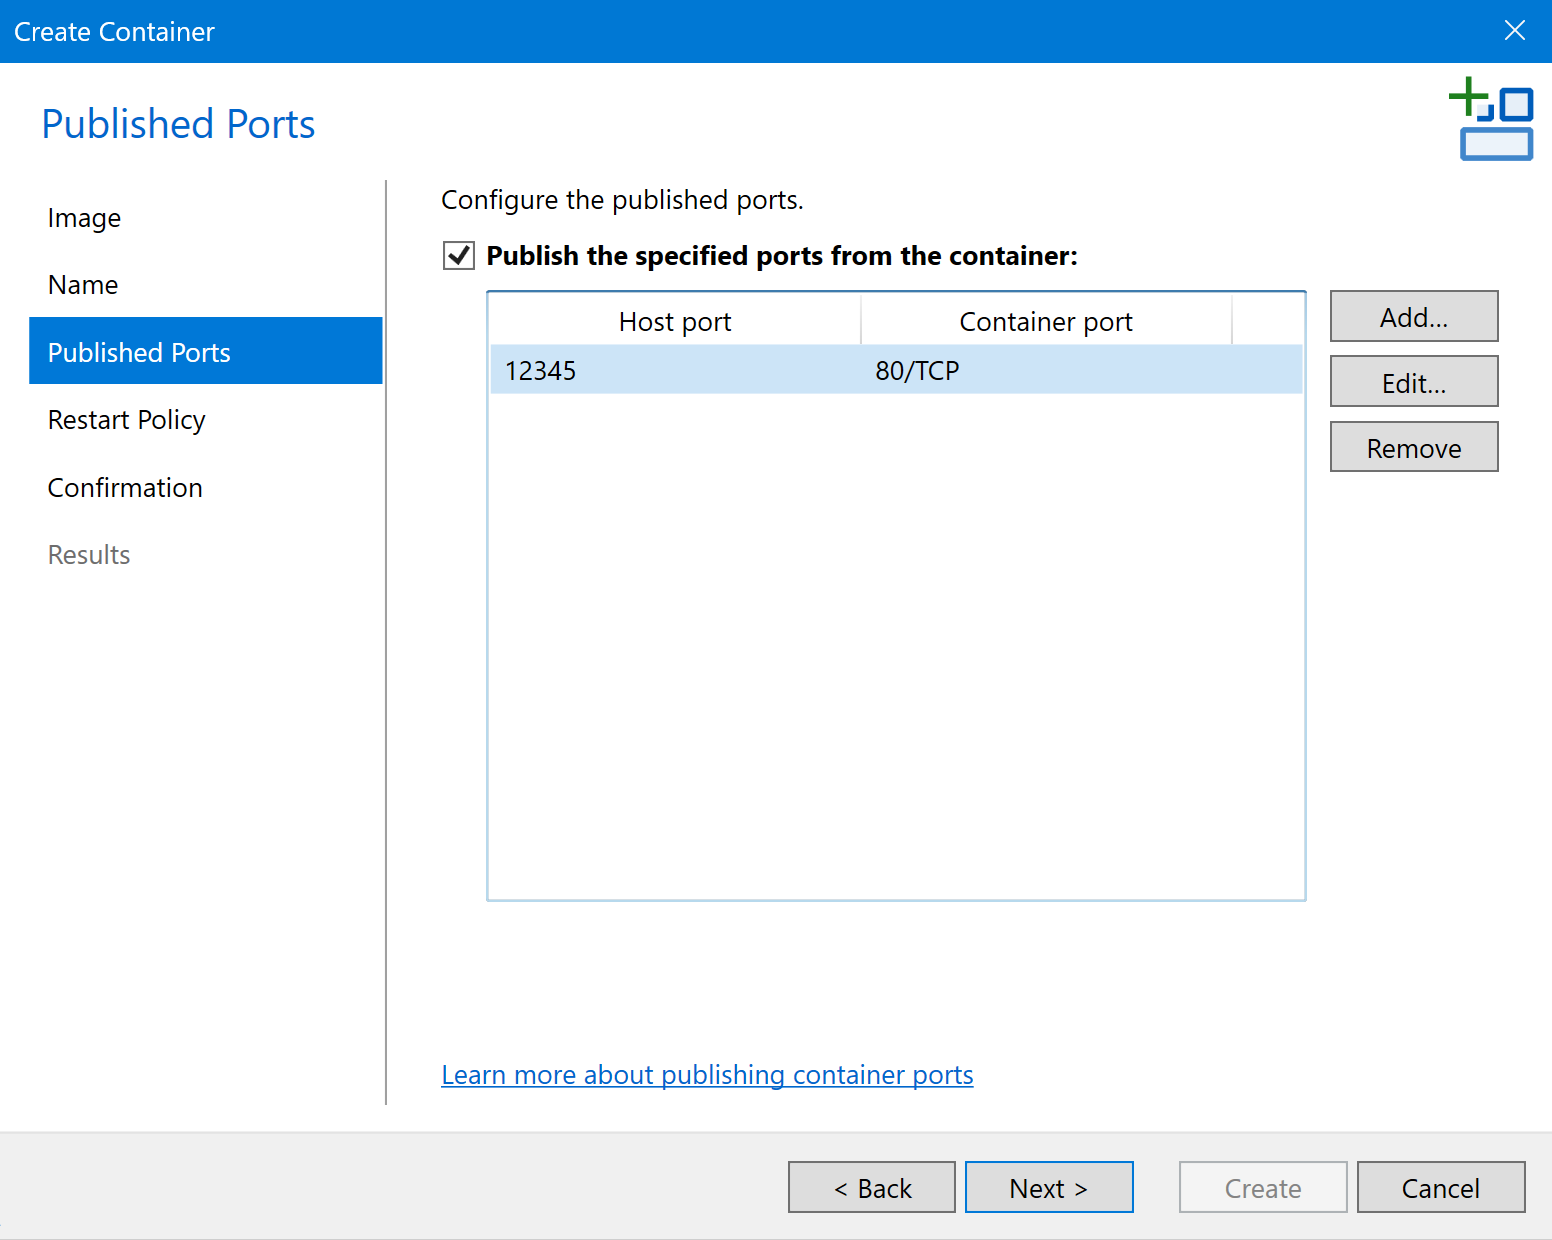
On the Published Ports page, you can publish certain container ports, making them available outside the host:
-
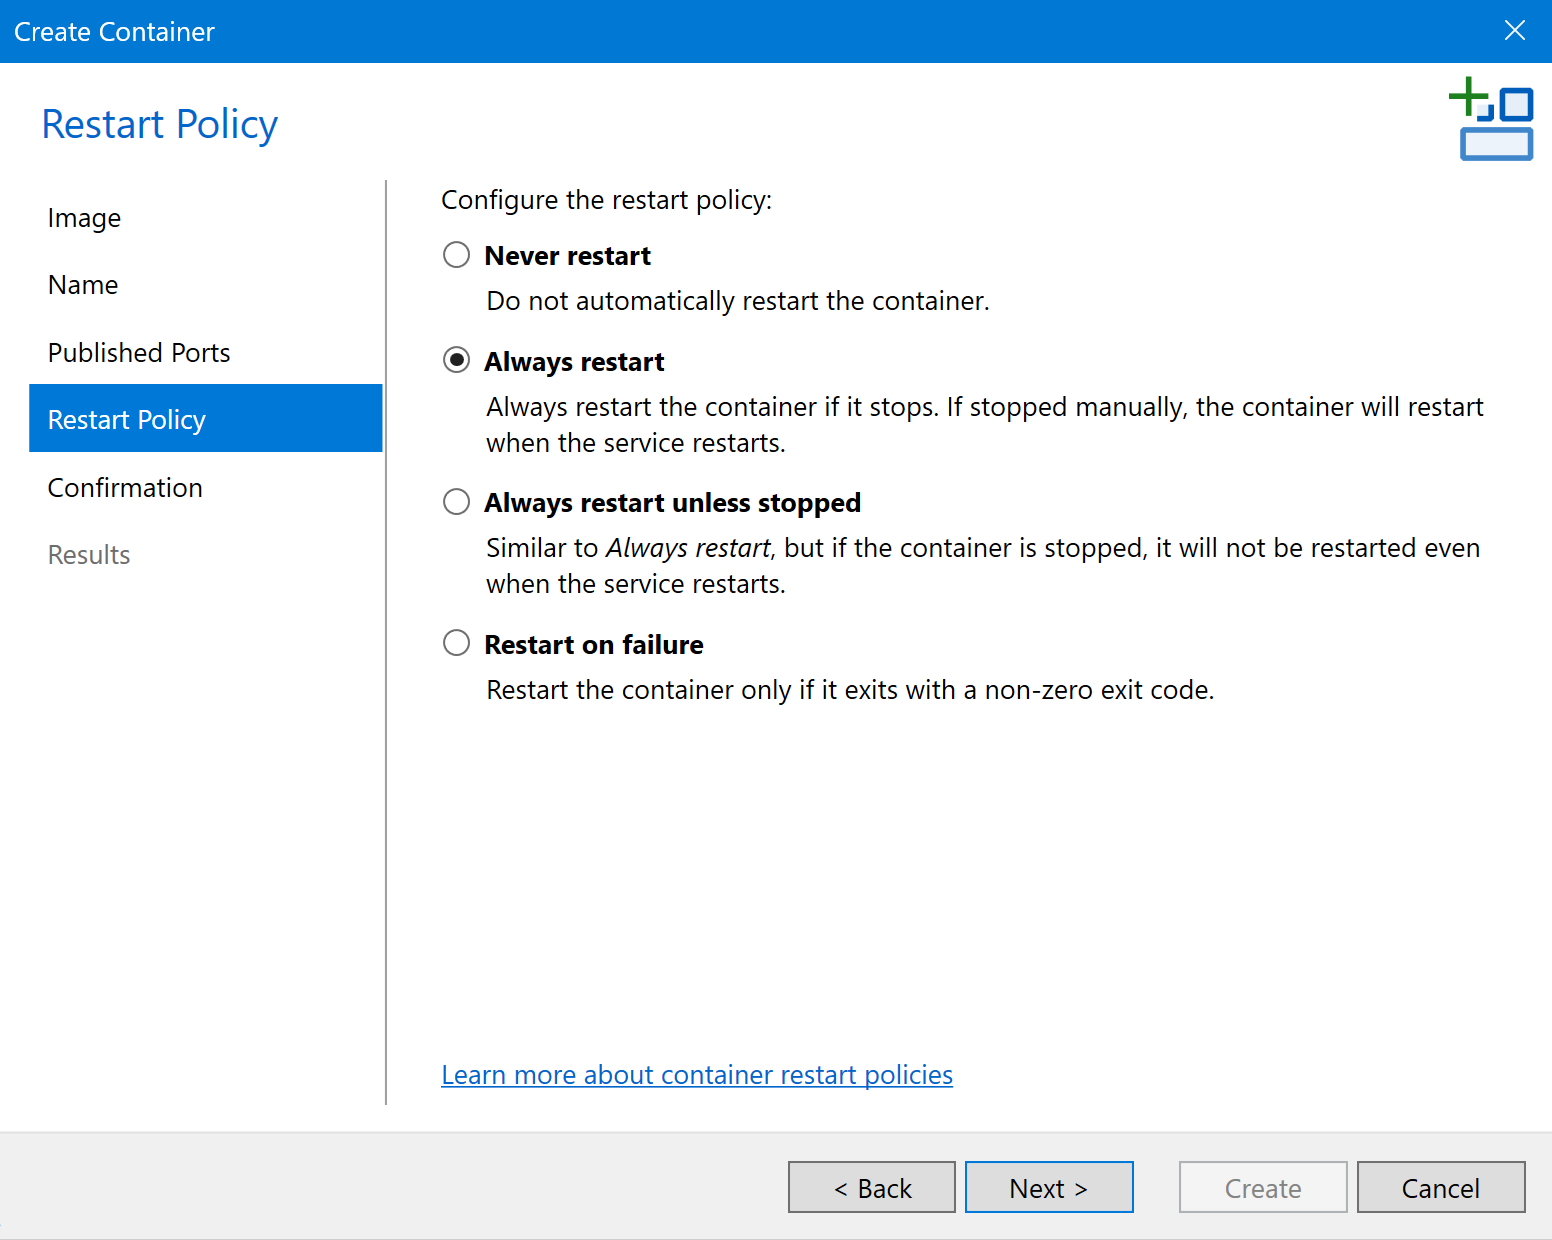
On the Restart Policy page, select the container restart policy:
-
On the Confirmation page, click Create:
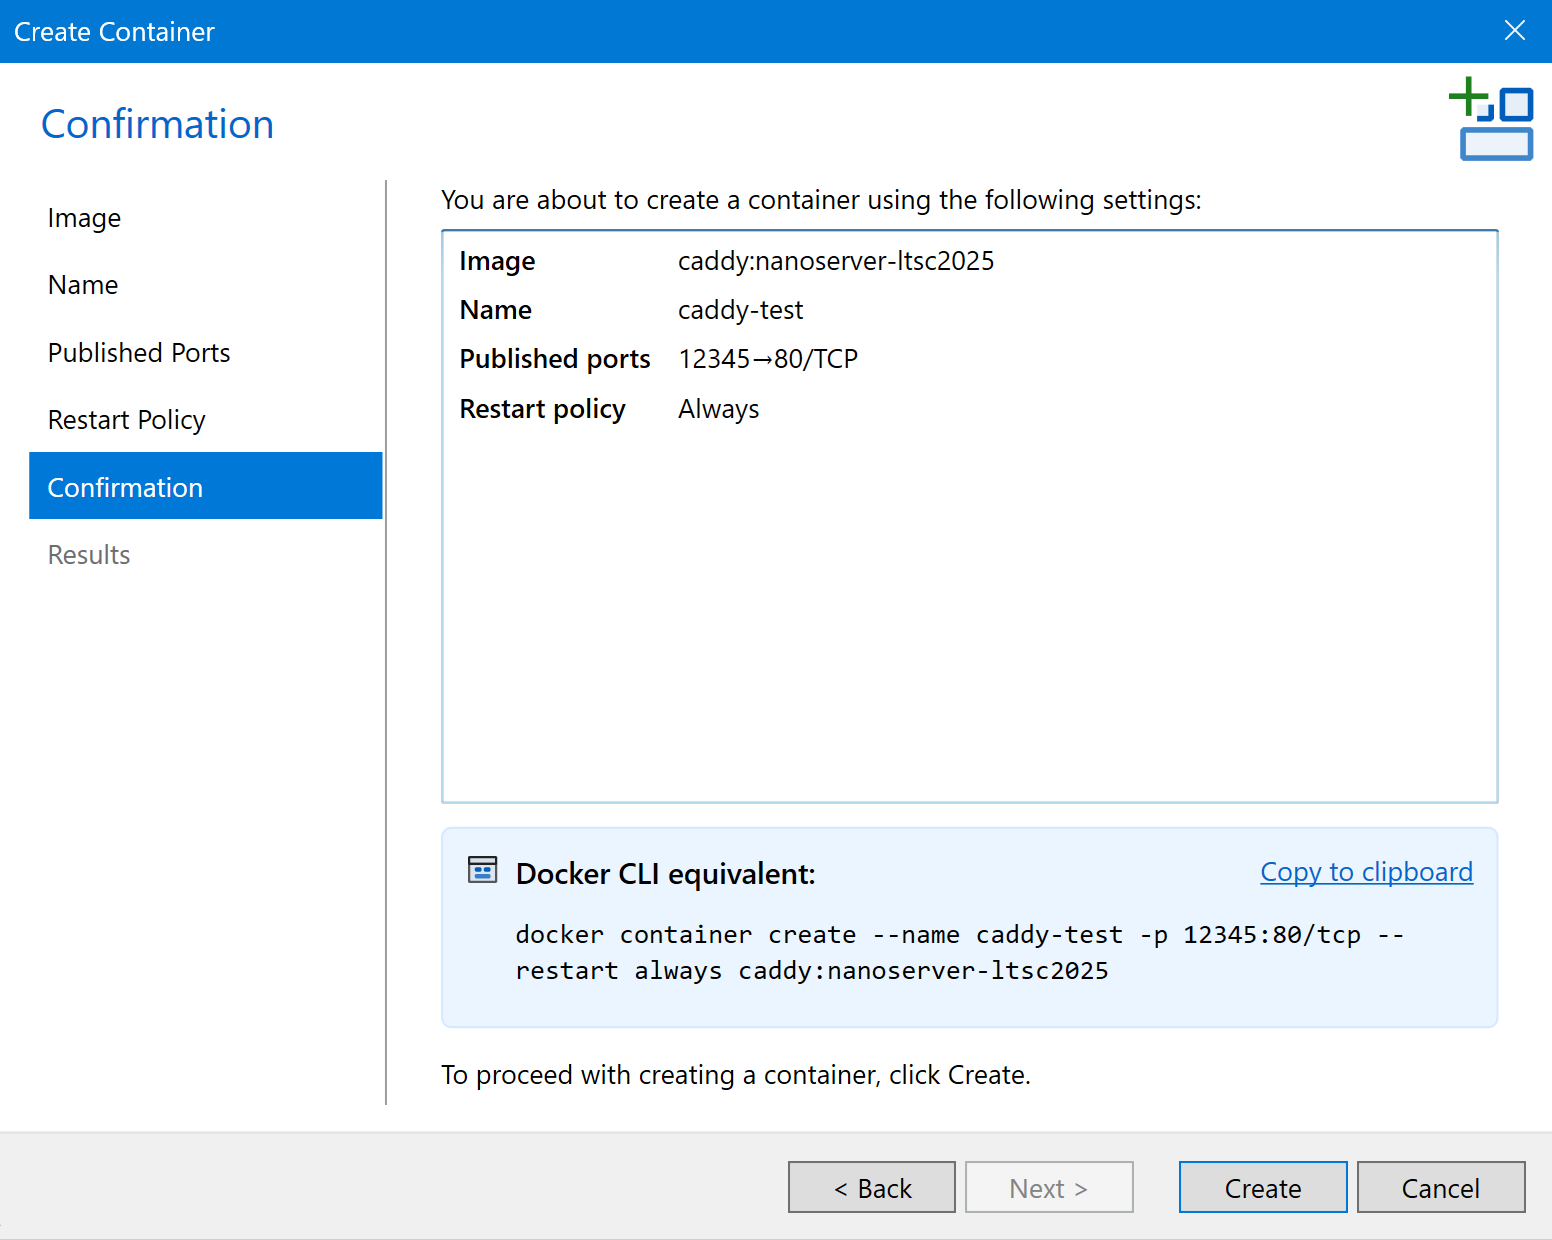
The wizard displays the equivalent Docker CLI command for your selected options. For advanced configuration, you can click Copy to clipboard, modify the command as needed, and run it in the command shell.
-
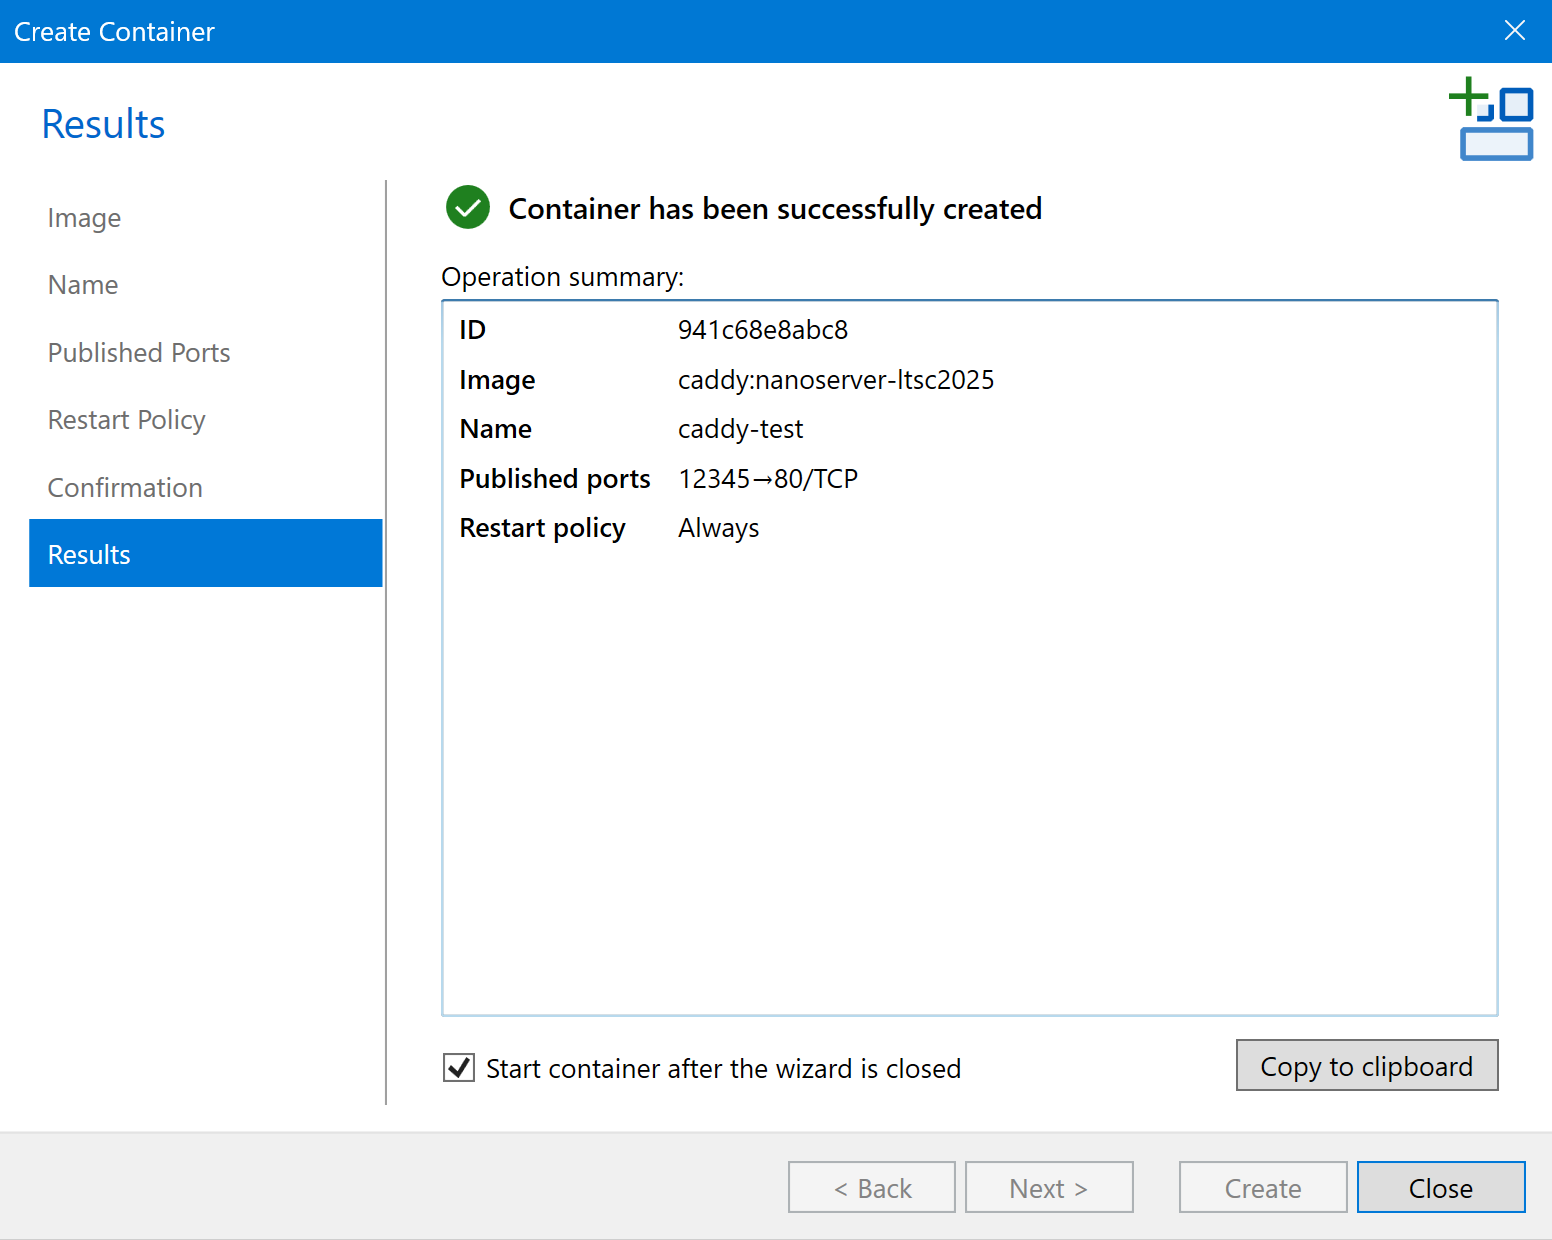
On the Results page, select if you would like to Start container after the wizard is closed:
-
Click Close. You will see the created container in the list.